Mounting the Rear Axle
This process in itself is very simple, however great care has to be taken however to make sure that the axle is in the correct position and parallel to the front two wheels. If mounted incorrectly, the handling of the kart could be severely compromised and would increase tire wear. This is, in my opinion the next step in the making of this kart.
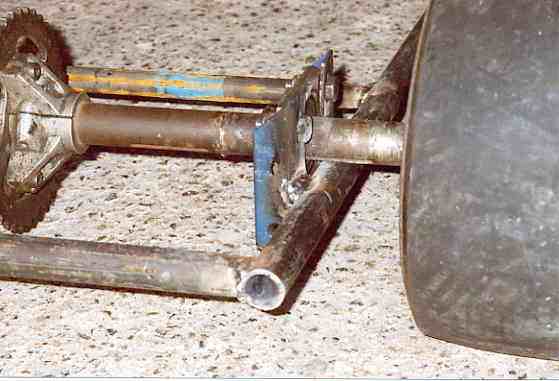
To make things easier, the chassis should be mounted up on blocks etc to allow easy movement and adjustment to the rear axle before welding. The rear axle is best mounted without the wheels attached. Of course it was an easy case of welding the bearing mountings to the chassis in the correct position. If you are not as fortunate to have a "donor" axle then I'd recommend going to the off free kart plans section HERE.
It's just a case of making sure that:
(a): The distance from the left front kingpin (the bolt securing the front stub axle to the chassis) to the left rear bearing mounting is equal to the distance from the right front kingpin to the right rear bearing mounting.
(b): That the rear axle is 90 degrees/ perpendicular to the main two side rails of the chassis. It should be a case that if the calculation in part (a) is correct then this should also be equal.
If you have an axle from an old kart then it is simply welded in place exactly as is done in the photo below:
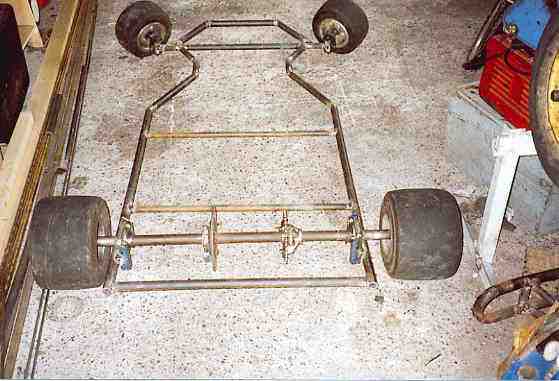
When you have the rear axle in place you should have something like in the picture below with the front wheels and rear wheels in place secured to the chassis ready for the next stage in making this kart.
It does not matter where the sprocket and brake disc are positioned at this stage. There position will be determined later on.