Making the Chassis
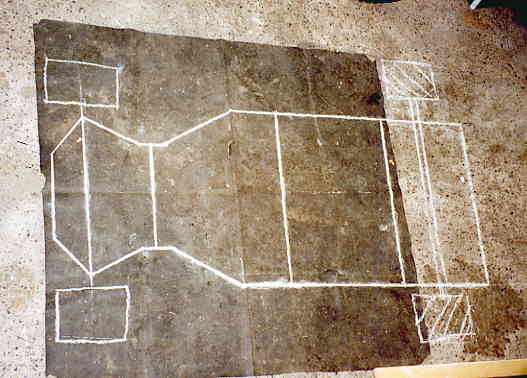
Before making the chassis a lot of thought went into it's design and the factors a kart chassis needs in order to handle properly on the straight and on corners. Although you may not realise this, but a chassis needs to be able to flex and twist. This is especially important when cornering. From experience of making previous chassis I have found that solid rigid chassis handle very poorly round corners and on the road in gereral. As a result I had to take this into mind when designing the chassis. It is my own new design that I chose, and it designed so that there would be a certain amount of flexing in the chassis but not too much that would reduce the strength of the kart. You can see from the photo below the final sketch/ chassis design I came up with.
The design I agreed upon, adopts having a rigid seat/ engine/ rear end, with the center of the chassis "waisted in", to allow the necessary twist to take place while cornering, and with the front of the chassis is splayed out to allow space for the drivers feet and to provide adequate support for the front wheels and the steering. The 'front end' of the chassis is very important and must be considered before constructing the chassis. More details can be found on the following website: Tech Tips - Steering.
As you can see from the above photo the front of the kart is designed to allow freedom of movement rather than one heavy solid rigid chassis. I also kept the cross braces to a minimum because I didn't want one big heavy chassis but rather one suited to a racing kart which would feel as though it were welded to the road especially on corners!
The Necessary Measurements:
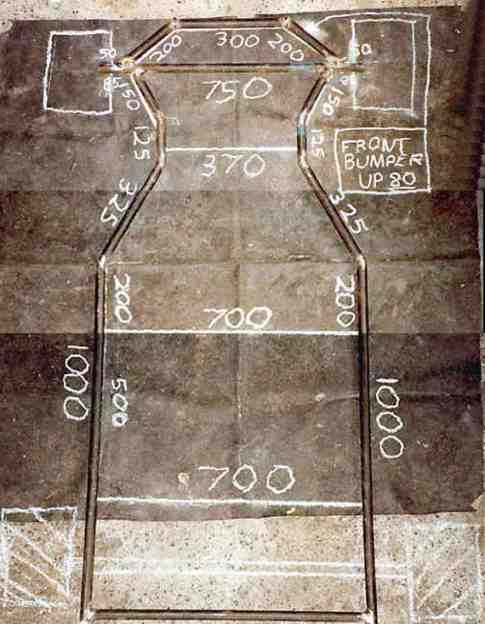
You can see from the photo below all the measurements of the various pieces/ sections of the chassis. Apologies for the wait in download time. As I said in the NOTE earlier I have endeavored to compress the jpegs and much as possible with the loss of some quality.
It says in the photo that the front bumper is up 80 mm. If you look further down this page you will see that the front member of the chassis is raised up off the ground to form a sort of bumper.
OF COURSE IF you have a pipe bender, grrrreat, work away, however for me, I had to cut the pieces out individually out with a Hacksaw, and carefully weld all the pieces together making sure there were no weak joints. All the necessary measurements are given in the photo directly below.
You can see from the photo below how the front member of the chassis is raised 80mm up off the ground. All that there is left to do then is to weld in the cross members strengthening up the chassis but not compromising flexibility. As I said earlier I used 20mm O.D. tubing (wall thickness of 3mm) because it was cheaper.
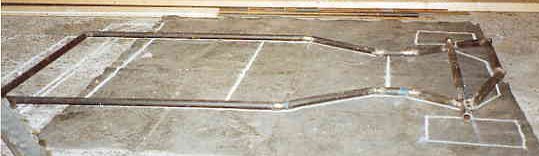
When you have all the necessary components welded in place, test the chassis for any weaknesses or holes in the welding and joining because it is here where things would go wrong. Make sure to spend a good deal of time and patience at this section as this is the foundation for everything else on the kart.